
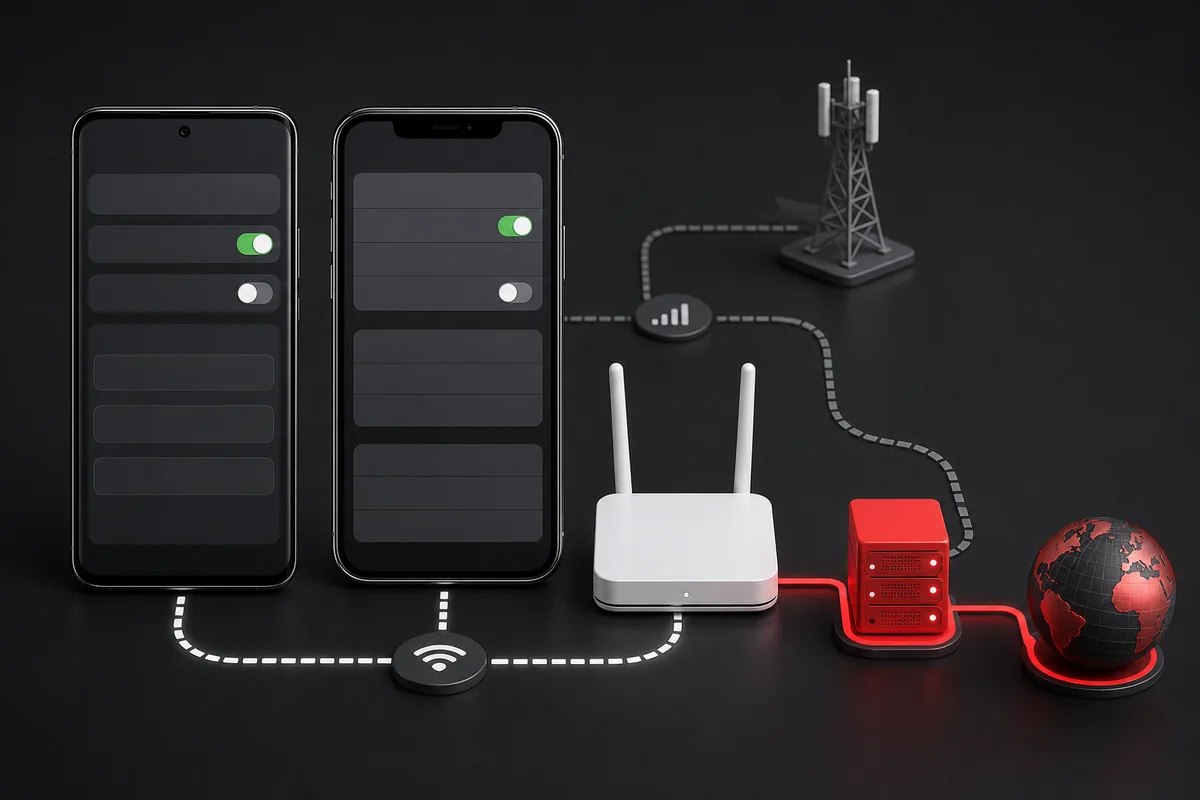
On Android or iPhone, the native manual proxy setting normally applies to one saved Wi-Fi network. Open that network’s advanced or information screen, choose a manual HTTP proxy, enter the host and port, save, and then verify the exit in a browser while still connected to that Wi-Fi network.
Scope: this tutorial covers native per-Wi-Fi HTTP proxy settings on current Android and iOS families. It does not promise device-wide SOCKS5 or cellular routing. For desktop setup, use the browser and operating-system guide; browse all clients in the Proxy Setup and Developer Guides hub.
Before changing mobile network settings
Collect the proxy host, port, authentication method, expected location, and a direct exit-IP baseline. Confirm that the phone is connected to the intended Wi-Fi network. The native fields are generally designed for HTTP proxy use; do not enter a SOCKS5 endpoint and assume the phone will translate protocols.
Keep a screenshot of the original setting without exposing the Wi-Fi password or proxy credentials. If the network is managed by an employer or school, follow its profile and support process instead of overriding policy.
Android proxy setup for a Wi-Fi network
Menus vary by manufacturer, but Google’s current Pixel network settings documentation describes the common path: open Network & internet, select the network, edit advanced options, choose a proxy configuration type, enter the details, and save.
- Open Settings, then Network & internet or Connections.
- Open Internet or Wi-Fi and select the connected network.
- Choose Edit, Manage, or Advanced options.
- Set Proxy to Manual.
- Enter
HOSTandPORT. - Add bypass hosts only when the network administrator documents them.
- Save and reconnect to that Wi-Fi network if required.
The Android proxy is a Wi-Fi scope setting. Many browsers and apps honor the system HTTP proxy, but an application can use its own network stack, private DNS, VPN tunnel, or direct socket and may behave differently.
iPhone proxy setup for a Wi-Fi network
Apple’s official advanced network settings guidance confirms that the Wi-Fi information screen can configure an HTTP proxy. On an already configured phone, use the corresponding information page for the connected network.
- Open Settings and tap Wi-Fi.
- Tap the information button beside the connected network.
- Scroll to Configure Proxy.
- Select Manual.
- Enter
HOSTandPORT. - Enable authentication only when the service uses username and password, then supply them through the protected fields.
- Save and return to Wi-Fi settings.
The iPhone proxy is attached to that saved Wi-Fi network. Switching to another Wi-Fi network or to mobile data changes the route. Managed devices can also receive proxy or PAC settings through configuration profiles.
Understand Wi-Fi scope, cellular limitation, and app behavior
| Traffic | Native Wi-Fi proxy likely applies? | What to verify |
|---|---|---|
| Browser HTTP/HTTPS on configured Wi-Fi | Usually | Exit IP, TLS, and authentication prompt |
| Another saved Wi-Fi network | No | That network has its own setting |
| Cellular data | No | Route returns to carrier unless another managed tunnel exists |
| Apps with custom networking | Maybe not | App documentation and observed route |
| UDP and non-HTTP protocols | Not generally | Protocol-specific client support |
This cellular limitation matters during testing: a phone can silently prefer cellular when Wi-Fi has no internet. Disable cellular data briefly only if safe and permitted, or watch the active network indicator, so a successful page load is not mistaken for successful proxy routing.
Mobile verification after saving
- Confirm the phone remains on the configured Wi-Fi network.
- Open a new private browser tab.
- Request a trusted HTTPS exit-IP endpoint and compare the direct baseline.
- Open a second approved HTTPS site and verify normal certificate behavior.
- Test one relevant app separately instead of assuming browser success covers it.
- Switch to cellular or another Wi-Fi network and confirm the setting’s boundary.
Expected observation: the browser shows the assigned proxy exit only on the configured Wi-Fi network, HTTPS remains valid, and applications that honor the system HTTP proxy follow the same route. Cellular data and other Wi-Fi networks should not inherit the setting.
Fix common Android and iPhone proxy failures
A connection failure before any prompt usually means a wrong host, port, route, or offline endpoint. A repeated credential prompt points to username/password rejection or a client method mismatch. If the browser works but one app does not, the app likely ignores the Wi-Fi proxy or needs its own configuration.
Never install an unknown certificate or disable TLS checks to make a warning disappear. Use the common proxy error guide to separate 407, timeout, DNS, TLS, and destination failures. Use the proxy verification guide for repeat and location checks.
Remove the mobile proxy cleanly
Return to the same Wi-Fi network’s proxy screen and choose None or Off. Reconnect, repeat the exit baseline, and remove saved credentials from any app that stored them. Do not forget the setting on a shared or frequently used network because an expired endpoint can later make that Wi-Fi appear broken.
Privacy and safety limits: a phone proxy does not encrypt traffic that lacks its own protection, cover every application, replace a VPN, or grant access to restricted services. Use only approved networks and accounts, keep credentials private, and verify actual app behavior.
Choose a mobile-compatible proxy only after checking scope
If the real requirement is browser traffic on one Wi-Fi network and a stable exclusive exit, confirm HTTP proxy authentication support and compare the brief with current private proxy options. Device-wide or cellular routing needs a different, explicitly managed design.
What should you retest after moving from Wi-Fi to mobile data?
Repeat the route check from the application on the newly active connection. A proxy attached to a saved Wi-Fi network may no longer apply after the device switches to cellular. Do not treat the last Wi-Fi result as evidence for the mobile app’s current route; review application support or an approved broader routing solution if needed.
For the related implementation or diagnosis, compare application and device routing scope.